使用 vscode 的调试功能
使用 webpack 构建为例,简单介绍使用 vscode 调试 node 脚本的方法。
官方文档
微软官方的说明文档:Launch configurations
开始
本文基于手动配置的 vue 文件编译项目上改动,项目看前面的文章vue-loader 的执行原理。
添加脚本
在编译项目下新建脚本文件index.js,输入以下内容
const { exec } = require("child_process");
exec("npm run build", (error, stdout, stderr) => {
  if (error) {
    console.error(`执行出错: ${error}`);
    return;
  }
  console.log(`stdout: ${stdout}`);
  console.log(`stderr: ${stderr}`);
});
脚本很简单,就是通过脚本自动执行 npm run build 命令进行构建,实际使用中可以是别的 shell 命令或其他操作。
添加配置
在项目根目录下新建.vscode文件夹,在该文件夹下新建 launch.json 文件,并输入以下内容
{
  // Use IntelliSense to learn about possible attributes.
  // Hover to view descriptions of existing attributes.
  // For more information, visit: https://go.microsoft.com/fwlink/?linkid=830387
  "version": "0.2.0",
  "configurations": [
    {
      "type": "node", // 调试类型
      "request": "launch",
      "name": "启动调试",
      "cwd": "${workspaceRoot}", // 命令执行的目录
      "skipFiles": ["<node_internals>/**"],
      "program": "index.js", // 执行的脚本路径
      "args": ["start"] // 参数
    }
  ]
}
开始调试
在想要调试的文件中打断点,本例中在 vue-loader 的 index 中断点了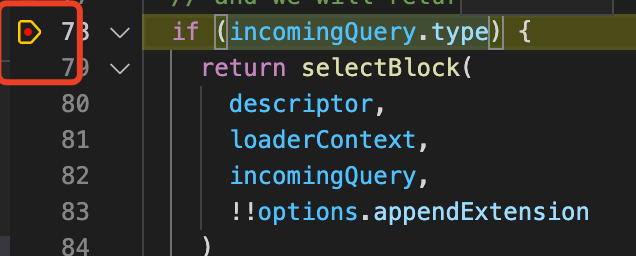
然后点击调试面板中的启动即可运行到想要断点调试的地方了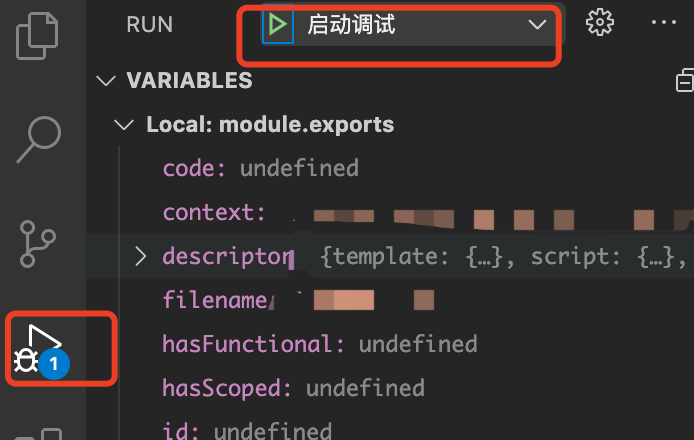
使用该方法理论上可以调试所有 node 脚本。